The Case
If you’re looking at adding real-time capabilities to a Django project with WebSocket, you have two main options.
Using Django Channels, a project adding WebSocket to Django, among other features. This approach is fully supported by Django. However, it requires switching to a new deployment architecture.
Deploying a separate WebSocket server next to your Django project. This technique is well suited when you need to add a small set of real-time features — maybe a notification service — to a HTTP application.
so we can build real-time app using ASGI service and webSocket then integrate to Django, to integrate with django, we need to install some package call Channel
Create Django Project
to create django project we need to setup virtualenv
pip install virtualenv
Creating Virtualenv
to create using this command
virtualenv venv
then activate
venv\Scripts\activate
if on linux or mac
source venv/bin/activate
Installing Required Package using pip
The next step is install required package using pip
pip install django channels
Create Django Project using Django admin
django-admin startproject core
and rename core directory to backend
| backend
|
├───chat
│   ├───migrations
│   │   └───__pycache__
│   ├───templates
│   │   └───chat
│   └───__pycache__
└───core
    ├───settings
    │   └───__pycache__
    └───__pycache__
and then create the chat app using manage.py
python manage.py startapp chat
Configure the apps
in installed app append channels and chat like this
# settings/base.py
"""
Django settings for core project.

Generated by 'django-admin startproject' using Django 4.0.1.

For more information on this file, see
https://docs.djangoproject.com/en/4.0/topics/settings/

For the full list of settings and their values, see
https://docs.djangoproject.com/en/4.0/ref/settings/
"""
import os
from pathlib import Path

# Build paths inside the project like this: BASE_DIR / 'subdir'.
BASE_DIR = Path(__file__).resolve().parent.parent.parent


# Quick-start development settings - unsuitable for production
# See https://docs.djangoproject.com/en/4.0/howto/deployment/checklist/

# SECURITY WARNING: keep the secret key used in production secret!
SECRET_KEY = 'django-insecure-$x4(6tpf$&@+kv+_=^*4vh0cp1xjzygx@xp6rb&@db^29c_xo#'

# SECURITY WARNING: don't run with debug turned on in production!
DEBUG = True

ALLOWED_HOSTS = []


# Application definition

INSTALLED_APPS = [
    'django.contrib.admin',
    'django.contrib.auth',
    'django.contrib.contenttypes',
    'django.contrib.sessions',
    'django.contrib.messages',
    'django.contrib.staticfiles',

    # Third Party
    'channels',
]

ASGI_APPLICATION = 'core.asgi.application'

# CHANNEL LAYER DEV ONLY
CHANNEL_LAYERS = {
    'default': {
        'BACKEND': 'channels.layers.InMemoryChannelLayer'
    }
}

MIDDLEWARE = [
    'django.middleware.security.SecurityMiddleware',
    'django.contrib.sessions.middleware.SessionMiddleware',
    'django.middleware.common.CommonMiddleware',
    'django.middleware.csrf.CsrfViewMiddleware',
    'django.contrib.auth.middleware.AuthenticationMiddleware',
    'django.contrib.messages.middleware.MessageMiddleware',
    'django.middleware.clickjacking.XFrameOptionsMiddleware',
]

ROOT_URLCONF = 'core.urls'

TEMPLATES = [
    {
        'BACKEND': 'django.template.backends.django.DjangoTemplates',
        'DIRS': [
            os.path.join(BASE_DIR, 'templates')
            ],
        'APP_DIRS': True,
        'OPTIONS': {
            'context_processors': [
                'django.template.context_processors.debug',
                'django.template.context_processors.request',
                'django.contrib.auth.context_processors.auth',
                'django.contrib.messages.context_processors.messages',
            ],
        },
    },
]

WSGI_APPLICATION = 'core.wsgi.application'


# Database
# https://docs.djangoproject.com/en/4.0/ref/settings/#databases

DATABASES = {
    'default': {
        'ENGINE': 'django.db.backends.sqlite3',
        'NAME': BASE_DIR / 'db.sqlite3',
    }
}


# Password validation
# https://docs.djangoproject.com/en/4.0/ref/settings/#auth-password-validators

AUTH_PASSWORD_VALIDATORS = [
    {
        'NAME': 'django.contrib.auth.password_validation.UserAttributeSimilarityValidator',
    },
    {
        'NAME': 'django.contrib.auth.password_validation.MinimumLengthValidator',
    },
    {
        'NAME': 'django.contrib.auth.password_validation.CommonPasswordValidator',
    },
    {
        'NAME': 'django.contrib.auth.password_validation.NumericPasswordValidator',
    },
]


# Internationalization
# https://docs.djangoproject.com/en/4.0/topics/i18n/

LANGUAGE_CODE = 'en-us'

TIME_ZONE = 'UTC'

USE_I18N = True

USE_TZ = True


# Static files (CSS, JavaScript, Images)
# https://docs.djangoproject.com/en/4.0/howto/static-files/

STATIC_URL = 'static/'

# Default primary key field type
# https://docs.djangoproject.com/en/4.0/ref/settings/#default-auto-field

DEFAULT_AUTO_FIELD = 'django.db.models.BigAutoField'
here is a development settings
# settings/development.py
from .base import *

INSTALLED_APPS += [
    'chat'
]


DATABASES = {
    'default': {
        'ENGINE': 'django.db.backends.sqlite3',
        'NAME': BASE_DIR / 'db.sqlite3',
    }
}
Create Route URL Patterns
to create url pattern create file named routing.py and define websocket route
# chat/routing.py

from django.urls import re_path
from . import consumers

websocket_urlpatterns = [
    re_path(r'ws/socket-server/', consumers.ChatConsumer.as_asgi())
]
Configure ASGI
the next step is configure ASGI to establish connection to server
# core/asgi.py

"""
ASGI config for core project.

It exposes the ASGI callable as a module-level variable named ``application``.

For more information on this file, see
https://docs.djangoproject.com/en/4.0/howto/deployment/asgi/
"""

import os

from django.core.asgi import get_asgi_application
from channels.routing import ProtocolTypeRouter, URLRouter
from channels.auth import AuthMiddlewareStack

import chat.routing

os.environ.setdefault('DJANGO_SETTINGS_MODULE', 'core.settings.development')

# configure asgi for chat
application = ProtocolTypeRouter(
    {
        'http': get_asgi_application(),
        'websocket': AuthMiddlewareStack(
            URLRouter(
                chat.routing.websocket_urlpatterns
            )
        ),
    }
)
Create Customers
to communicate with each other we need to configure connection, it call customers.py
# chat/customers.py

from email import message
import json
from asgiref.sync import async_to_sync
from channels.generic.websocket import WebsocketConsumer

class ChatConsumer(WebsocketConsumer):
    def connect(self):
        self.room_group_name = 'test'
        async_to_sync(self.channel_layer.group_add)(
            self.room_group_name,
            self.channel_name
        )

        self.accept()


    def receive(self, text_data):
        text_data_json = json.loads(text_data)
        message = text_data_json['message']

        async_to_sync(self.channel_layer.group_send)(
            self.room_group_name,
            {
                'type': 'chat_message',
                'message': message
            }
        )

    def chat_message(self, event):
        message = event['message']

        self.send(text_data=json.dumps(
            {
                'type': 'chat',
                'message': message
            }
        ))
Create Views to Rendering Templates
and then we need to configure route for rendering html so creating views.py inside chat folder
# chat/views.py

from django.shortcuts import render

# Create your views here.

def lobby(request):
    return render(request, 'chat/lobby.html')
Configure URLPattern to Mapping Views
The next step is configure routing
from django.urls import path
from . import views

urlpatterns = [
    path('', views.lobby, name='lobby')
]
and add to core/urls.py
"""core URL Configuration

The `urlpatterns` list routes URLs to views. For more information please see:
    https://docs.djangoproject.com/en/4.0/topics/http/urls/
Examples:
Function views
    1. Add an import:  from my_app import views
    2. Add a URL to urlpatterns:  path('', views.home, name='home')
Class-based views
    1. Add an import:  from other_app.views import Home
    2. Add a URL to urlpatterns:  path('', Home.as_view(), name='home')
Including another URLconf
    1. Import the include() function: from django.urls import include, path
    2. Add a URL to urlpatterns:  path('blog/', include('blog.urls'))
"""
from django.contrib import admin
from django.urls import path, include

urlpatterns = [
    path('admin/', admin.site.urls),
    path('', include('chat.urls'))
]
Creating HTML Template To Pass the webSocket Connection
to add Template create html file call lobby.html inside templates/chat/ directory
<!-- chat/templates/chat/lobby.html -->
<!DOCTYPE html>
<html lang="en">
<head>
    <meta charset="UTF-8">
    <meta http-equiv="X-UA-Compatible" content="IE=edge">
    <meta name="viewport" content="width=device-width, initial-scale=1.0">
    <title>Chat Lobby</title>
</head>
<body>
    <h1>Lobby</h1>

    <form action="" id="form">
        <input type="text" name="message" id="">
    </form>

    <div id="messages"></div>

    <!-- web socket connection -->
    <script type="text/javascript">
        let url = `ws://${window.location.host}/ws/socket-server/`

        const chatSocket = new WebSocket(url);
        chatSocket.onmessage = function(e) {
            let data = JSON.parse(e.data);
            console.log('Data: ', data);

            // validate data from backend
            if (data.type === 'chat') {
                let messages = document.getElementById('messages')

                messages.insertAdjacentHTML('beforeend', `<div><p>${data.message}</p></div>`)
            }
        }

        // form handling
        let form = document.getElementById('form')
        form.addEventListener('submit', (e)=>{
            e.preventDefault()
            let message = e.target.message.value
            chatSocket.send(JSON.stringify(
                {
                    'message': message
                }
            ))
            form.reset()
        })
    </script>

</body>
</html>
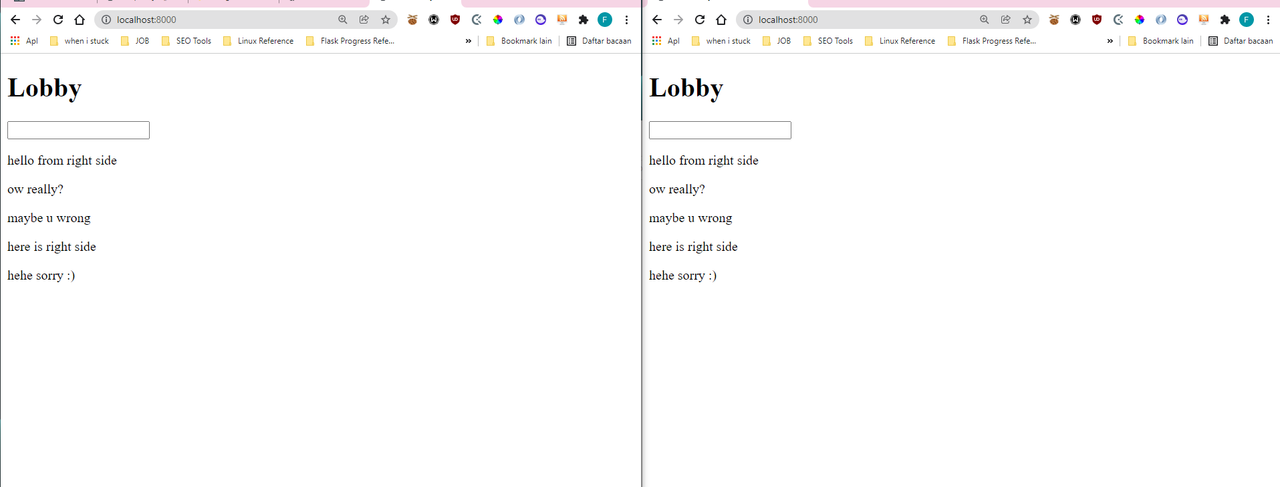
Test The APP
run django project with this command
python manage.py runserver
Conclusion
With web Socket we make web appication can handle real-time event, Source Code Available on Github